

We all lead busy lives. Meetings at work, dentist appointments and even children's school activities, their tuition and music classes; not to mention our own daily tasks and responsibilities is enough to keep us on our toes.
Lucky for us, smartphones these days come with daily reminders and calendars to help us keep track of all these activities and responsibilities. For some of us who prefer the 'old fashion way', we keep planners and write these appointments and tasks down. We decorate them too (that's me). To take things further, SOME of us (that's me again) will have a notice board in our home to pin down all these important tasks and information.
There are so many way great ways that a notice board can help us organise our schedule. You can even use it as a communication board, a dream (goal) board or an idea board. It saves time looking for that small piece of paper around the house and it will be a good place to refer to when family members want to look for any information.
I have a few notice boards around the house, my kitchen, our bedrooms and my craft area. I pin my reminders, my grocery list, the children's chores, take away menus and craft ideas. I even put notes down for my husband and children as reminders or just letting them know that there is that delicious piece of chocolate cake in the fridge for them. Once the event or task is done, just discard and add on new messages or reminders.
I have a few notice boards around the house, my kitchen, our bedrooms and my craft area. I pin my reminders, my grocery list, the children's chores, take away menus and craft ideas. I even put notes down for my husband and children as reminders or just letting them know that there is that delicious piece of chocolate cake in the fridge for them. Once the event or task is done, just discard and add on new messages or reminders.
There are many different types and styles of notice boards that you can get from the stationery shop, such as cork and metal boards. Here, I would like to share with you how easy and inexpensive it is to make a notice board using either a cake base or a thin plywood.

1. Cake base (size to your liking, as there are square and round)
2. Foam or sponge
3. Fabric
4. Stapler gun
5. Twine
6. Pins
6. Pins
Let's make!
Step 1

Measure your foam or sponge according to the size of your cake base.
Step 2
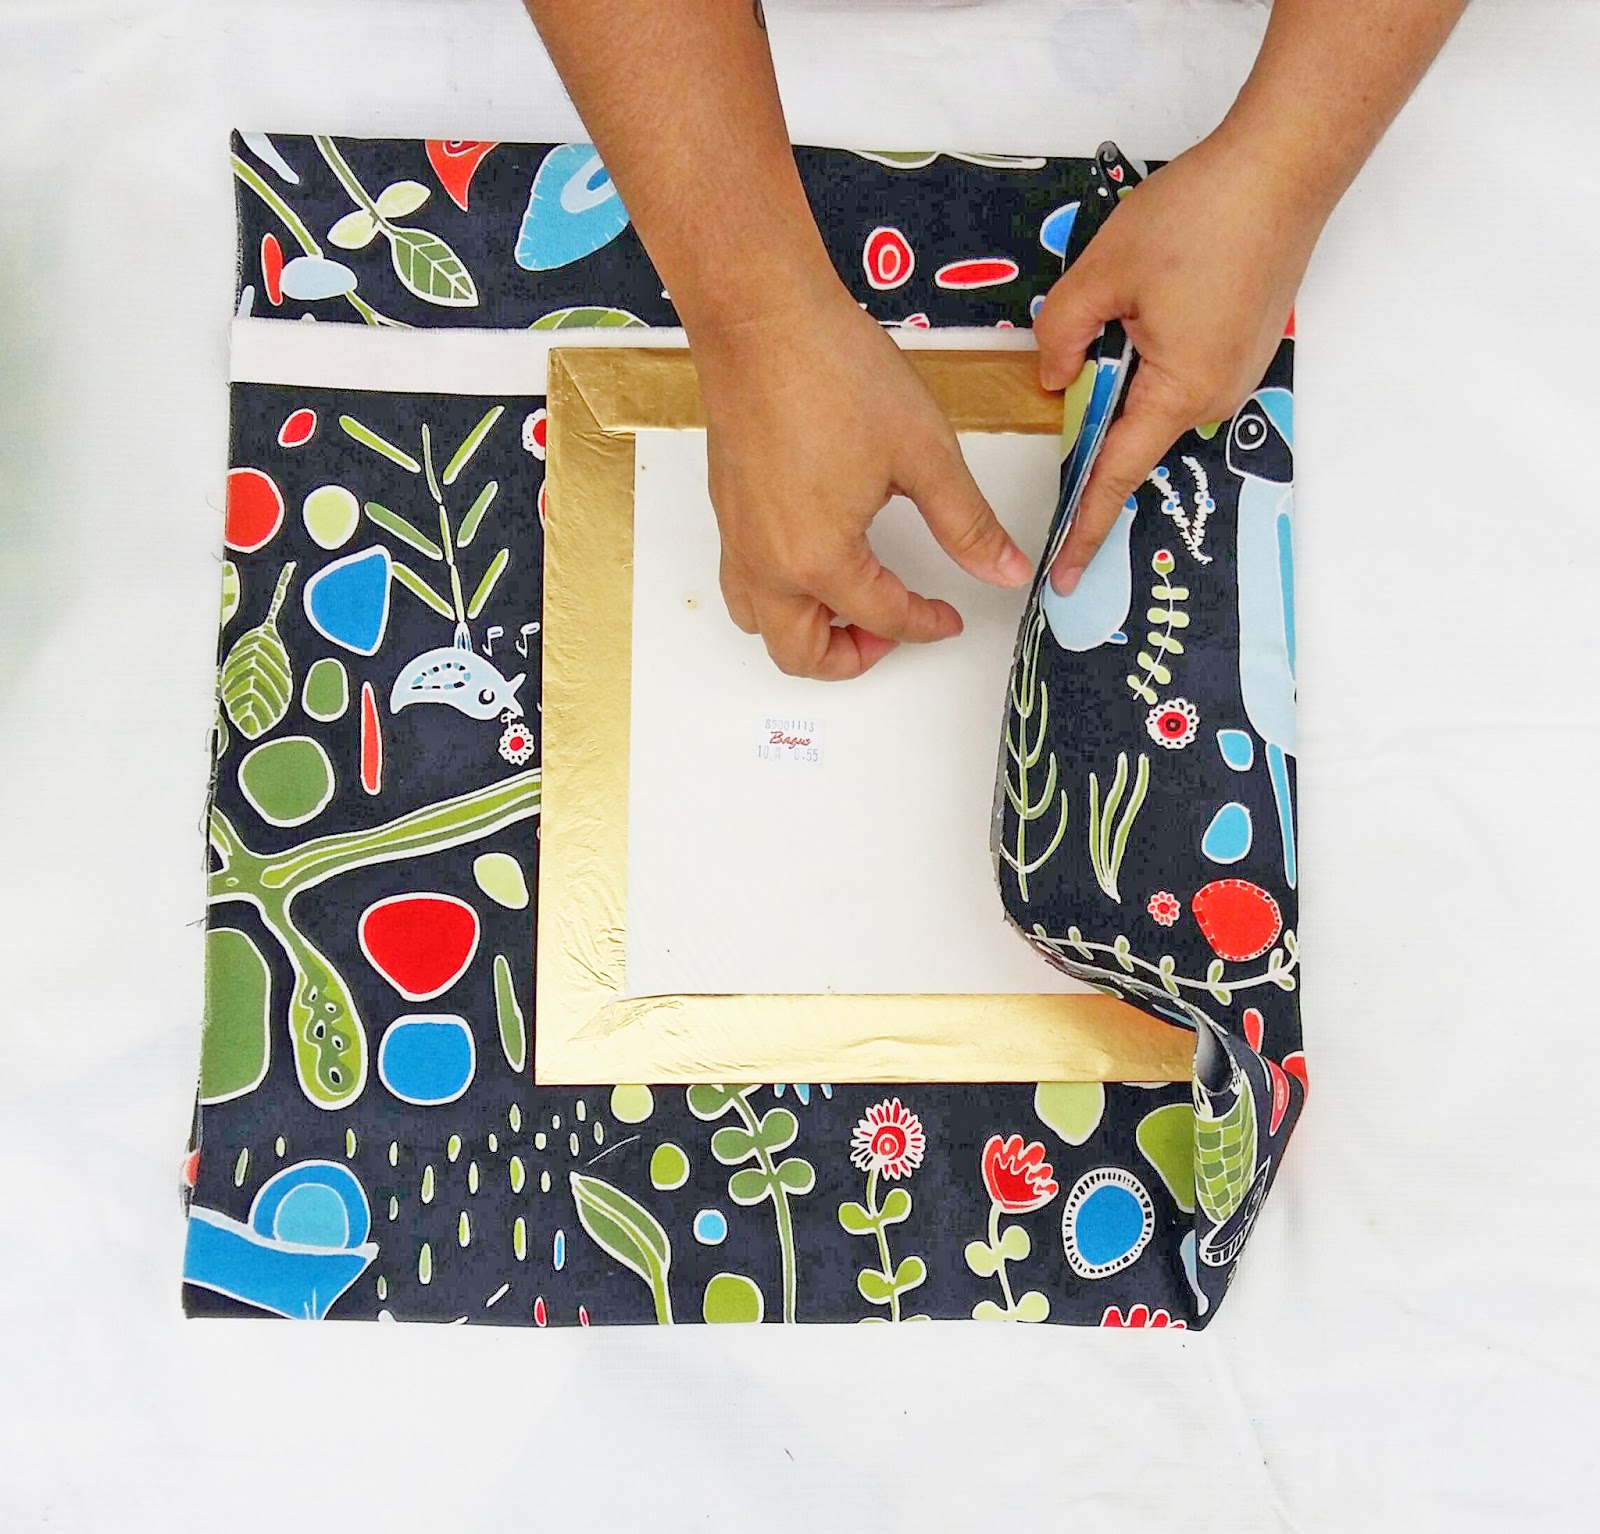
Then measure your fabric leaving about 3cm extra so that you can fold over the fabric behind.
Step 3

Use your stapler gun to secure the fabric behind.
Step 4

Next, you can choose to either hang your notice board or let it rest against a wall or shelf.

If you choose to hang your notice board, decide on the length of your twine and tie a knot on each end. Use your stapler gun and secure the twine to the back of your notice board so that you can hang it up.

Your notice board is now ready to use. You can make a few and line them up together or just use one notice board on it's own. So remember, next time, when you have finished your cake, do not throw that cake base away!

We hope you find this DIY project useful. Give it a try!

No comments
Post a Comment
Tell us what you think